
Making the Handle
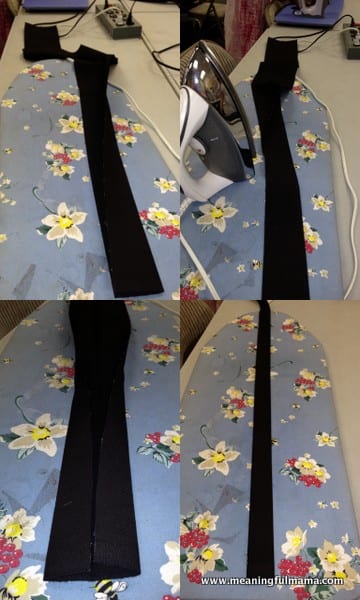
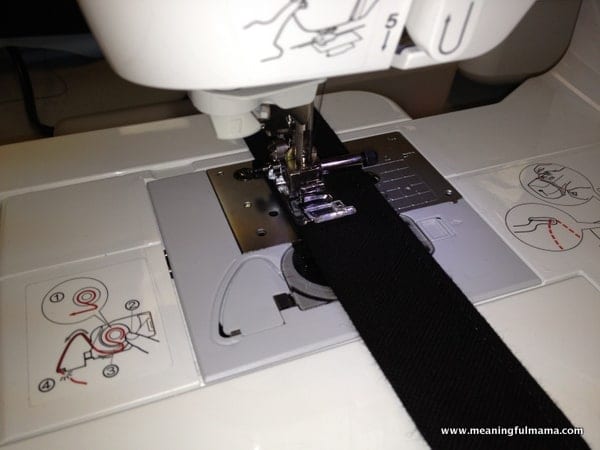
Using a straight stick, align the presser food along the edge of your strap and stitch. Repeat on the other side.
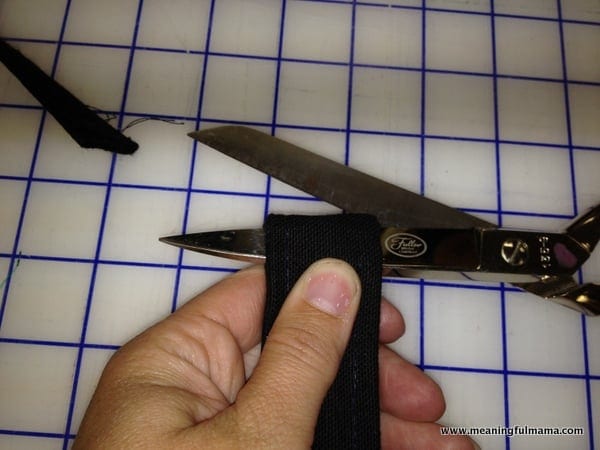
Fold your long strip in half and cut so you now have two handles. Handles are complete.
Making the Lining
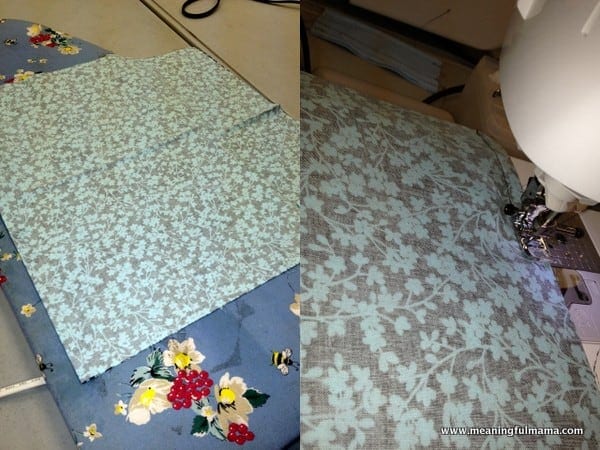
Fold the lining fabric in half (exterior side of the fabric touching itself), meeting the short ends. Iron & pin if necessary. Stitch along each side using a straight stitch and a 5/8″ seam allowance.
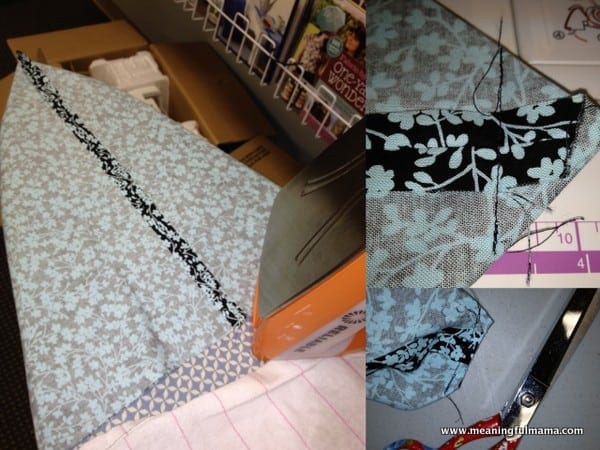
Slip the lining on an ironing board and open up the seams and press them back as best as you can with the iron. Measure up 1″ from the corner point and stitch across this location. Cut the triangle at the top off. Repeat this process on the other side of the lining
Making the Outer Bag

Fold the exterior fabric in half (outer sides together), meeting the short ends and pin if necessary. Stitch along each long side using a straight stitch and a 5/8″ seam allowance. This is exactly how you did the lining.

Slip the bag on an ironing board and open up the seams and press them back as best as you can with the iron. Measure up 1″ from the corner point and stitch across this location. Cut the triangle at the top off. Repeat this process on the other side of the outer bag. This is the same process you did with the lining.
At the top of the bag, measure 1″ from the top edge. Fold on this line (toward you – the bag is still inside out and press with an iron. Fold it over once more time. Press.
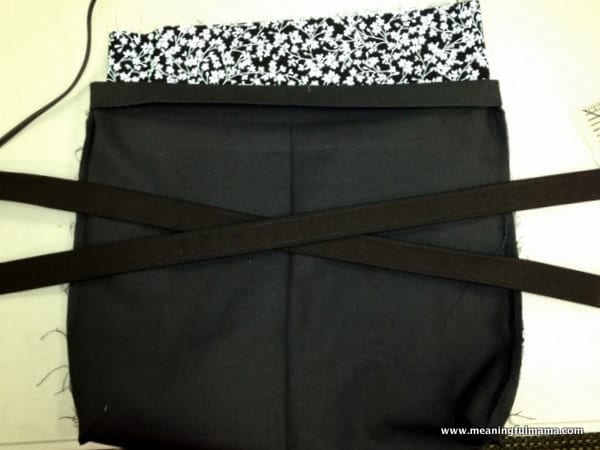
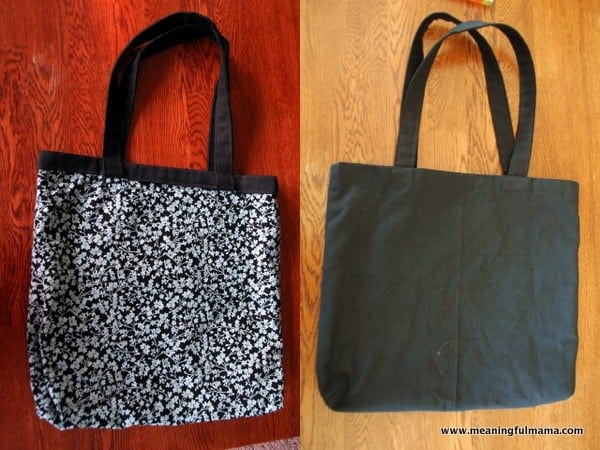
You now have two sewn handles, the outer bag and the inner bag that you get to assemble into one piece.

Turn the lining so the pretty side is showing. Place the lining over the outer bag (ugly side touching ugly side of lining). Make sure to match the corners and the side seams. You will slip the lining just up under the top fold. You may need to trip a little off to make the bag sit well with each other. Pin the lining in place at the seams.
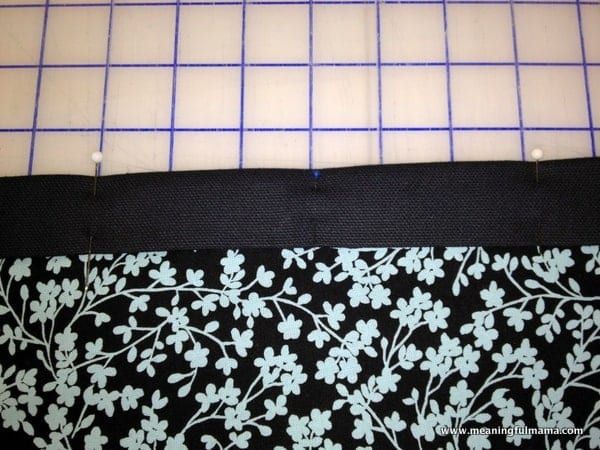
At the top, find the center of the bag on both sides. I marked mine with the blue stick pin. Then, measure 3″ from the center on both sides. Mark these points with a stick pin. You see mine marked with the white pins above. Do this on both sides of the bag. This will help with the placement of the handles.

At the markings you made for the handles, slip the ends of the handles under the hem and pin into place. Do this on both sides, making sure your handles are not twisted the wrong way.
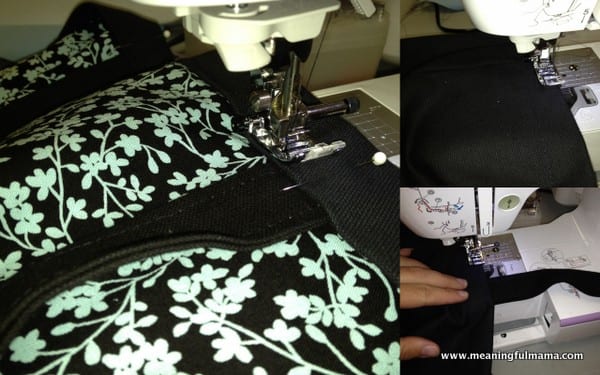
With a straight stitch, sew around the bottom of the folded edge. Go all the way around the bag. Next, flip the handles up toward the outside of the bag. Repeat a top stitching around the top edge of the bag. You may want to stitch over the handle area a couple of times for extra security.
Questions? Just ask! I’ll try to help.


Cute bag! Thanks for the tutorial 🙂
Hi Jodi,
So cute! Love the color!Thanks so much for sharing.
Have a look at my blog I’ll be so glad.
Hugs from Portugal
Ana Love Craft
http://www.lovecraft2012.blogspot.com