This past weekend we had our church family camp, and the theme was about us being a church family. They wanted to create a 3 dimensional tree where each leaf would house a picture of a family that was on the retreat. They asked me to create it. We started brainstorming ideas. All I had seen done in the past was a paper mache or twisted paper version. However, after a quick brainstorming, we came up with swimming noodles and duct tape. I was suppose to set it up before the retreat, and I had a sinking feeling the night before. I thought it just wasn’t going to work. I hadn’t thought it through enough and suddenly realized I needed a base to keep it standing straight. Also, since we were navigating new waters, I was just unsure of the concept. Well, it worked, and it was actually really cool. I was super stoked about the results.
The first need was the base. My husband took a flatter piece of wood, approximately 36 x 28 inches. He then drilled a dowel to the center of the board going straight up. He also attached little pieces of wood around the dowel to create more stability. I should have taken a picture. If you need more information than that, let me know.
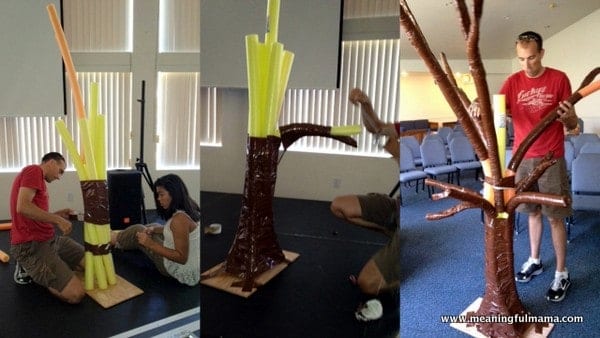
The next step was to duct tape the swimming noodles together. The center noodle had the dowel going up it. We also had the outer 5 noodles go a bit lower than the center noodle so that we could attach the upper limbs to the taller center stalk. We wrapped the brown duct tape around and around the structure. We Then wrapped noodles individually to create the branches. With the branches, we would take the ends and tear them down a little so they would branch out more into smaller branches.
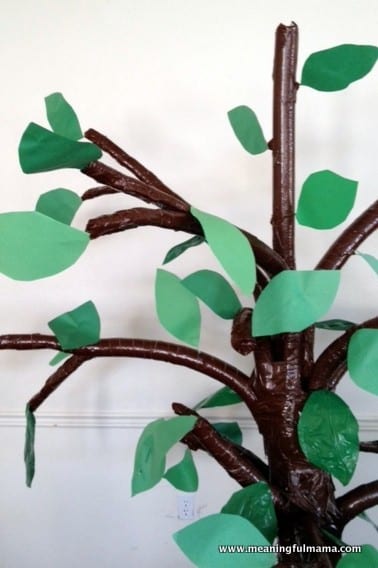
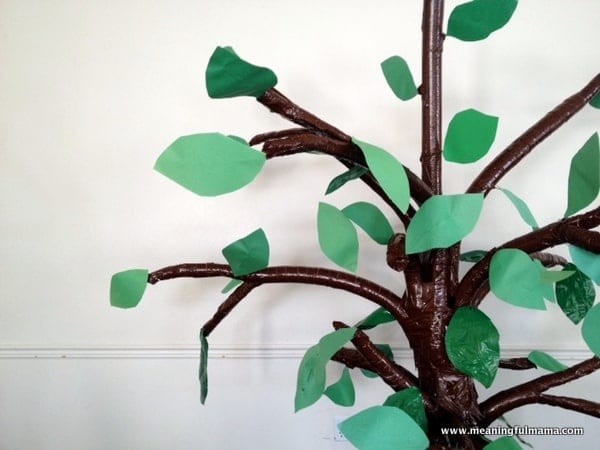
I started to make leaves out of green duct tape, but they were too heavy. So, I ended up just cutting out a bunch of leaves out of paper. I would fold floral wire over a few times to make them a bit stronger and tape it to the leaf. Then, I would take brown duct tape and tape the leaf “stem” (floral wire) to the branch. Again, I should have taken a picture, but if you want me to describe it more, let me know. It was nice to have the leaves on floral wire because they could bend into leafy shapes and have stability.
The final step was to add everyone’s picture to the tree. A tree like this would be great for a retreat, classroom, or on-stage production.
This tree only lasted a week before it was completely droopy, so I would try to find better solutions to making it more stable.
Note from a Meaningful Mama reader: I have had one in my classroom for years now and this idea might help. For the base attach a heavy empty carpet roll you can get easily at any carpet store when they throw them out to a piece of wood securely. This will never droop! Using beige brown heavy roll paper start twisting it and attach to this centre cylinder and just keep twisting and building up to make branches however you like. I have it against a bulletin board and staple the twisted limbs occasionally to the board for support and even the ceiling tips if ou want to go that high. It gets dusty as the years go by though. Then you can attach your leaves, butterflies, birds, owls the sky is the limit! I just love it!
Thanks so much for your input!


This is such a cool idea! If I’m every an Elementary school teacher I will totally do this in my classroom!
Great idea! I could see this in a class room as a thankful tree – kids write what they are thankful for on the leaves
at a baby shower – guests write wishes for baby on the leaves or you could add birds/owls to the tree
Halloween party/display – add bats, ghosts, spiders
Easter/spring time tree – add flower buds made from plastic eggs
I love that you made a tree! I can use this idea for my pumpkin patch next season! THanks for sharing it and for the great tutorial and pictures!
hello, i have to do a family tree for my reunion coming up and i really loved your tree that you created. i had more questions about creating the base of the tree and what materials were used to keep the tree stable. Also how many water noodles were used and the height of the noodles?
Hello Jada,I’m glad you like the look of our pool noodle tree. The one warning I do have that it didn’t last for long. It lasted through the retreat (3 days), but when we brought it back to the church it began to droop more and more. I would say it lasted a week.
The base was sort of a thrown together element. My recommendation would be to use a patio umbrella base if you have one sitting around. If I were to do it again, I’d do a base system more like this: http://www.pursellmfg.com/tru-cut-wood-stands-484c. I don’t think the cross braces are necessary. Rather than the trunk you see going up, I’d drill a hole in the center base the size of a dowel that fits inside a swimming noodle. I’d have the dowel between 2-3 feet long. Once your center dowel is in place, you can slip the center swimming noodle onto the dowel. It’s been a while now, but I would guess that you’d have 6-8 noodles going around that center noodle. The other noodles you need are for the branches. I would estimate 8 more noodles for branches, giving you a total of 15-17 noodles. The height of the noodle I would say is about 4 feet. That just an estimate. I’m 5’3″, and the ones I have come up to my chest.
I hope that was helpful. Good luck!
I love the idea! I have been struggling trying to figure out how I was going to construct my tree… and this is perfect 🙂 So the tree drooped at the base? The rest of it was okay? I want to use a tree as part of my theme this year in my classroom. Do you have more suggestions as to how to make it last longer than a week?
I might try and build it in a corner or against a wall and find a way to secure it there. I would try and brace it in the corner with some sort of wire that you could cover. I also have a post coming up where I used carpet rolls (just the center part after the carpet has been used) as the trunk for a palm tree. I wonder if you could use the carpet roll and have the swimming noodles duct taped to that and coming from the center. Just brainstorming out loud.
Hi there! Love your tree.! I have had one in my classroom for years now and this idea might help. For the base attach a heavy empty carpet roll you can get easily at any carpet store when they throw them out to a piece of wood securely. This will never droop! Using beige brown heavy roll paper start twisting it and attach to this centre cylinder and just keep twisting and building up to make branches however you like. I have it against a bulletin board and staple the twisted limbs occasionally to the board for support and even the ceiling tips if ou want to go that high. It gets dusty as the years go by though. Then you can attach your leaves, butterflies, birds, owls the sky is the limit! I just love it!
Thank you so much for this input. I just added it to my post. What helpful ideas. I really appreciate you taking the time to help with solutions for the droop!
We’re creating these as part of our set for our school musical. About how much duct tape did one tree take? Thanks!
Oh no – It was so long ago I don’t quite remember. I’m so sorry. My husband things we may have used 3-4 rolls per tree, but that is a guess. Good luck!