These gorgeous Perler bead bowls are a craft for kids that is easy and mess-free. If you are looking for a fun activity that yields a useful product, I think you will love making these bowls with your children.
Looking for more easy kid activities? Check out these 20 fun ideas that kids love.
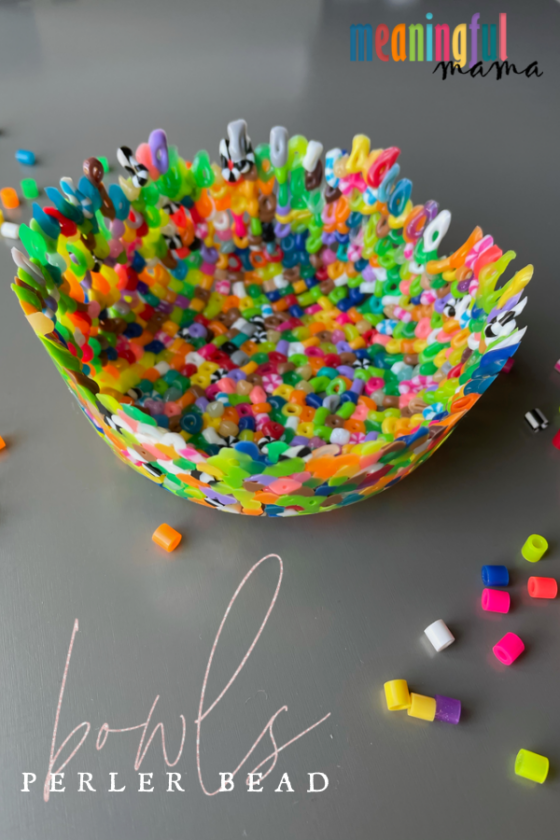
Plastic Perler Bead Bowls
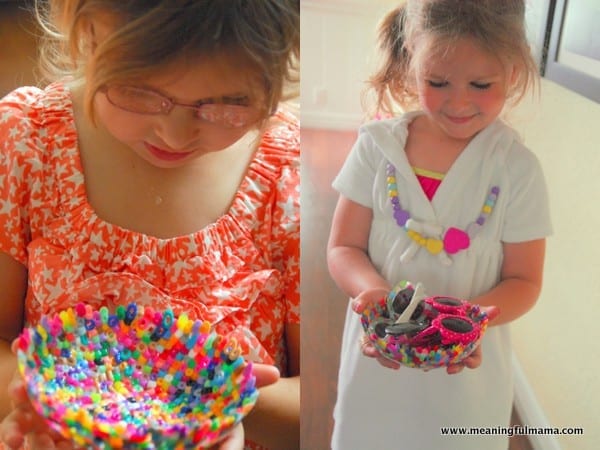
When my kids were little, they loved making these beautiful bowls. They fell in love with them. Don’t they just look like a piece of art?
The Perler bead bowls are easy to create, but they become useful because the DIY bowls are a great place for kids to store all of their trinkets.
From coins to jewelry, kids will love placing their items into their homemade Perler bead bowls.

Materials Needed to Make Plastic Perler Bead Bowls
For your convenience, I have added Amazon affiliate links. Everything you purchase goes to support the free resources I provide at Meaningful Mama. Thank you for your support.
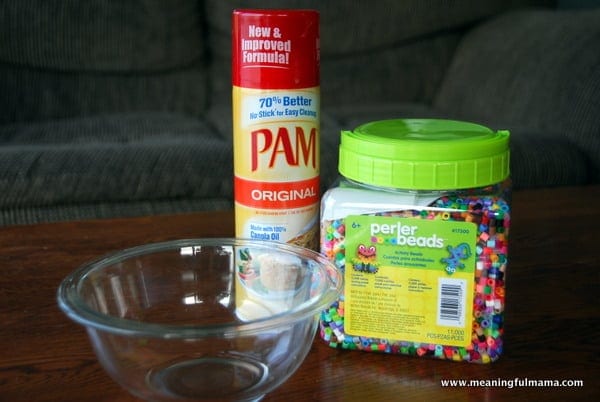
- Perler Beads
- Oven-Safe Bowl (the bowl featured is about 6 inches)
- Cooking Spray
How to Make a Homemade Plastic Perler Bead Bowl
- Preheat your oven to 375 degrees Fahrenheit.
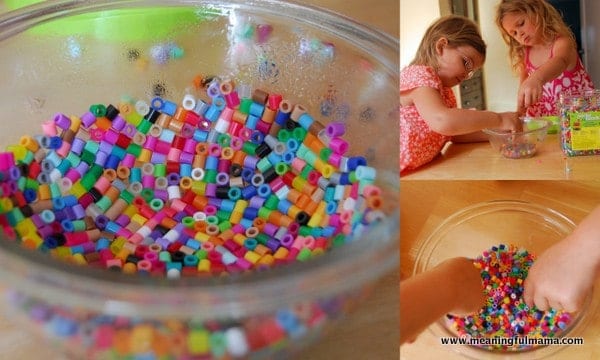
- Spray a layer of cooking spray in your oven-safe bowl.
- Take a bunch of Perler beads and drop them in the bowl.
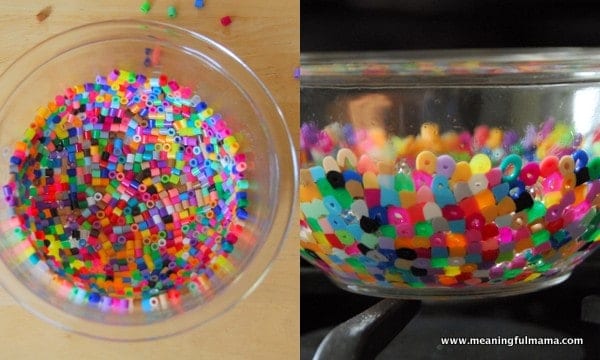
- Once you have a few handfuls in there, start to push them down so they form one single layer. As you push them into place, the beads will begin to climb up the sides of the bowl.
- Add more if you want a taller bowl – just make sure they are all a single layer.
- Once the Perler beads are pushed down, bake them at 375 degrees Fahrenheit for 12-14 minutes.
- Keep a watchful eye on the bowl to make sure the beads are melted together and adhere to one another but don’t melt too much.
Note: Some might be concerned about the smell and dangers of melting plastic in a home. I get it. I can say that the smell wasn’t bad, and I just had a small whiff of plastic as I opened the oven. However, if you are concerned about the chemicals released by melting Perler beads, a good alternative is to do the activity in the BBQ outside. Simply make sure the BBQ is turned to 375 and allow to cook for the 12-14 minutes suggested, checking at 10 minutes and again at 12-14.
Video Tutorial that Teaches How to Make a Perler Bead Bowl
I am a visual learner, and I want to make all of my crafts and activities easily accessible to all kinds of learners. Below is a video tutorial for those who would find it helpful.
Note: This post was originally written in 2012. It was updated for better formatting, some new pictures, and a video tutorial.
Want More Fun Kid Crafts?
Here at Meaningful Mama, my goal is to help provide resources to make parenting more fun and creative experience. I know how challenging the days can be. They can feel long and tiring. I hope that I can be a part of breathing life and enjoyment into your parenting journey.
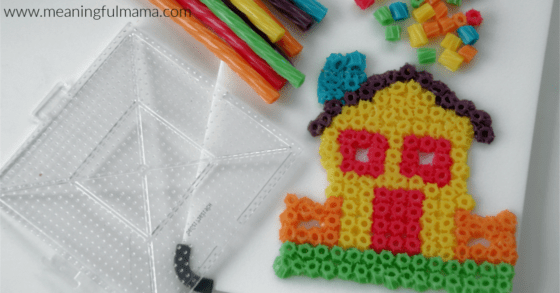
Edible Perler Bead Art with Twizzlers


Gorgeous! Another project on out to do list:)
Do you let bowl cool completely before taking bead bowl out?
Yes. I have found it doesn’t take long. Then, I would rinse it off.
Great idea! My little ones would love making these!
I love these! I’m going to have to make them with my grandson – I think he would get a kick out of how they stick together. Thanks for sharing!
I’m here checking you out from the Nifty Thrifty Sunday at Nifty Thrifty Things. If you get a chance check out my Sunflower Wreath posted there or at https://www.facebook.com/photo.php?fbid=3903374216259&set=a.3871155090801.2150445.1036342162&type=3&theater
I love this project. What a great gift idea and so simple to do.
Beth @ Hungry Happenings
We love perler beads. I will definitely have to try this with the kids.
What a lovely idea! Great bowls!
these are so so fantastic what a clever idea and they look gorgeous! I hope you’ll link it up at my What We Wore, Read and Made party
marissa
rae gun ramblings
Great idea !
but what is it the cooking spray and at which point of the process do we use it ?
You spray the bottom of the glass bowl before you put the beads in. Here’s a link to cooking spray: http://www.pamcookingspray.com/ It’s basically away to make sure it doesn’t stick to the bowl. If you don’t have cooking spray, you could probably just do a thin layer of oil or grease on the bowl. Not sure if it will be messier, but I’m sure you could just wash it off.
What kind of bowl you can use..im afraid it will explode when put in the oven
I use my glass mixing bowls for this project. I hope this helps. Have fun with it!
Thanks a lot,you ve been very helpful
Dina from Athens,Greece
I love these bowls. I wonder how deep you could make it before the beads start to fall from the sides back in the middle? Thanks for linking up at Mom’s Library!
I love these bowls! My daughter will for sure want to try this out. Thanks for sharing!
Blessings,
Nici ~ Posed Perfection
Congratulations! Your project was featured in July’s Top 5 most popular posts on Fun Family Crafts! Thanks for sharing your creativity, we love it! If you would like a special top 5 button to display, you can grab it at the bottom of the feature post. Thanks! http://funfamilycrafts.com/july-2012-top-posts/
Thank you so much! That’s really exciting. I tried to grab the button a few times and put it on the post, but it didn’t work for me. I just highlighted the html code and pasted, so I don’t know why it’s not working. Let me know if there’s another solution for that. Meanwhile, I’ll do a text link.
Did you use a pyrex bowl? and what size is the bowl you used?
I am having a hard time figuring that out.
Thank you,
Christine
My bowl was Pyrex, but you just need an oven safe bowl. The size I used was 7 1/4 inches in diameter measuring from the inside edges. I’m sure you can do other sizes though. I just did a placemat in a jelly roll pan https://meaningfulmama.com/2012/08/day-227-perler-bead-placemats.html, so I imagine there are a few options of things to do with these beads. I hope that helps!
it does! we are making them right now…
what kind of bowl? glass?
Yup – it’s an oven safe, glass bowl.
Great post! I quoted your blog in my post.
http://minimatisse.blogspot.com/2012/09/melting-beads.html
Thank you for linking back. Now I totally have to try the cookie cutter idea.
We made these yesterday and they kinda look like a piece of modern art. My mom was convinced we can sell them (hooray for super supportive mamas!)Thanks again for this awesome idea:
I quoted you twice: http://jewishhomeschoolnyc.blogspot.com/2012/10/parshat-noach-rain-and-rainbow-projects.html and here http://jewishhomeschoolnyc.blogspot.com/2012/10/perler-bead-fun.html
Do you think it would it work with other plastic beads? I have a big container of ones I bought from the dollar store that I don’t know what to do with!
I’m pretty sure it would work.
I’m trying it now, while the kids are napping! If it works I will help them make a few for themselves and the grandparents for Christmas. Today we tried the salt dough ornaments and they look great! My son (almost 4) scribbled blue marker on the one that was supposed to be Santa, and I admit I colored my 22 month old daughter’s one for her!
Did the dollar store beads work??????
She sent me pictures. They did work. They took a lot longer to melt and the result seemed a tad different. The beads seemed more round to me I the end. Still cute, and it looked like her kids enjoyed it.
Hi! We made these for several Christmas presents this year. We did a Pyrex glass bowl, ramekins for small little bowls, and also the cookie cutter suggestion in the comments above. Today we also did them in the bottom of a 13×9 Pyrex pan for a small placemat (in lieu of your pan/rod tutorial) which turned out to be really cute. Next we are thinking of just lining the bottom of ramekins for “coasters”. Thanks for the fun idea!