I was recently ask, “How do you store your kids’ art?” I have done one of two things, but recently had another idea that I will be implementing. So, here are the three things: 1) Take a picture. We have an online gallery, so I take a picture of their work and save it in a file. 2) Put it in the bin. Each child has a large plastic bin where I keep the special stuff that I can’t toss. 3) An art binder (or with older kids it would be a binder of all the school and art work they’ve done). The art binder idea came to mind because I’m a purger and Abby is a saver. She wants to save anything that her pen has touched. I’m a little too practical and just want things to go away. So, I found a balance.
The art binder is basically a binder filled with plastic sheet protectors…the kind you slide your work into. My deal is that she gets to put anything into this binder until there is no more room available. When space runs out, she will need to make some choices. Sometimes I might just need to make room for my favorites, but the goal is to have a manageable binder for each year of their childhood.
Cupcake Liner Art
I wanted to find a fun, graphic way to decorate the front of their binder, so I found this fun and simple idea that is great for kids of all ages.
Material List:
* Heavy card stock paper (I cut up tag board)
* Decorative Cupcake Liners
* Glue
* Sponge Brushes
* Scissors
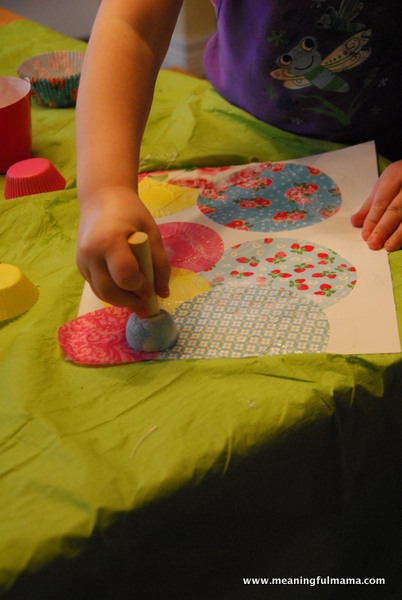
There are adorable cupcake liners at craft stores now. I have even seen some cute ones at my local grocery store. These I found in the discount bins at Michael’s. I love to do cupcakes, so the bonus is that now I have some adorable cupcake liners on hand.
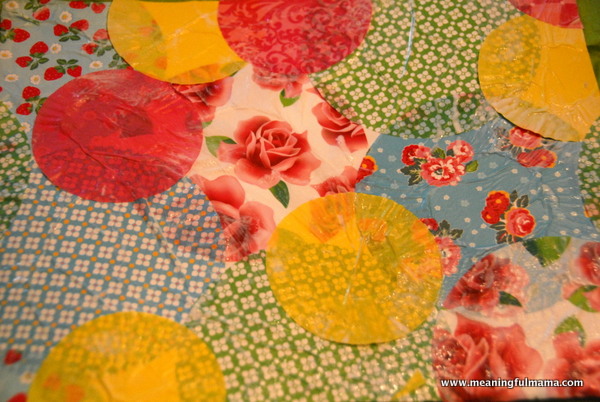
Begin by pouring the glue into a bowl. You then flatten out the cupcake liners you want to use. Taking the sponge brush, apply the glue to the area you want to lay your liner. Press down the cupcake liner and try and flatten. Then, apply a liberal amount of glue on top of the cupcake liner, flattening and smoothing as you go. Continue until the paper is full. For the edges, I just let the cupcake liner lay over the edge and then trimmed with the scissors as we went. Overlapping creates the cool effect seen.
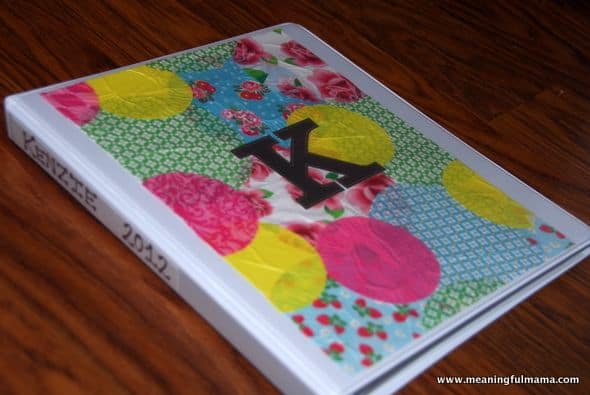
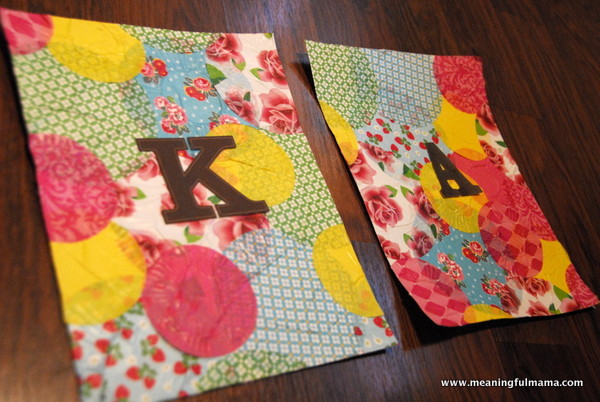
The end result is a graphic piece of art great for decorating your new art binder. I added their initial to help distinguish the binders.

Don’t want to do the cupcake liner art? Just decorate the front of their binder with a piece of art they’ve already done. Let them switch out their favorites.
The cupcake liner art idea I found on www.gummylump.com.
One other idea I’ve heard is to have a nice frame hanging someplace prominent. You then switch out your child’s artwork. It makes their pieces noticeable and hold a place of importance. It can be rotated often so that you can honor the efforts they’re putting into their work.


What a great idea, now I know what to do with all the left over cupcake liners I oly have a couple of.
Thank you for sharing.
I know! I think I’ll find more reasons to do this craft. I just loved the look.
SERIOUSLY I AM IN LOVE WITH THIS IDEA!! So so cute and creative! I would love it if you would link it up.
http://www.made-famous-by.com
Hugs,
Heather
Glad you found me. I’m linking up. Thanks for the heads up. I’m so new at this blog world too. It can be pretty involved. Just trying to find the balance. I hope it goes really well for you.
Super cute idea!!! I’m having a linky party as well, and would love for you to join it! Here is the link http://www.thesouthernproductqueen.com/one-stop-s… Thanks for sharing!
I work with special need adults and these are such great ideas and so perfect for most I work with. Thank you so much for sharing.
Yes, this would be a great activity for that, and it warms my heart to know that my idea will be used in that way. Thank you for letting me know.
[…] These cupcake liner collages make great book covers! They’d look so cute in a frame too! via Meaningful Mama […]
[…] These cupcake liner collages make great book covers! They’d look so cute in a frame too! via Meaningful Mama […]